

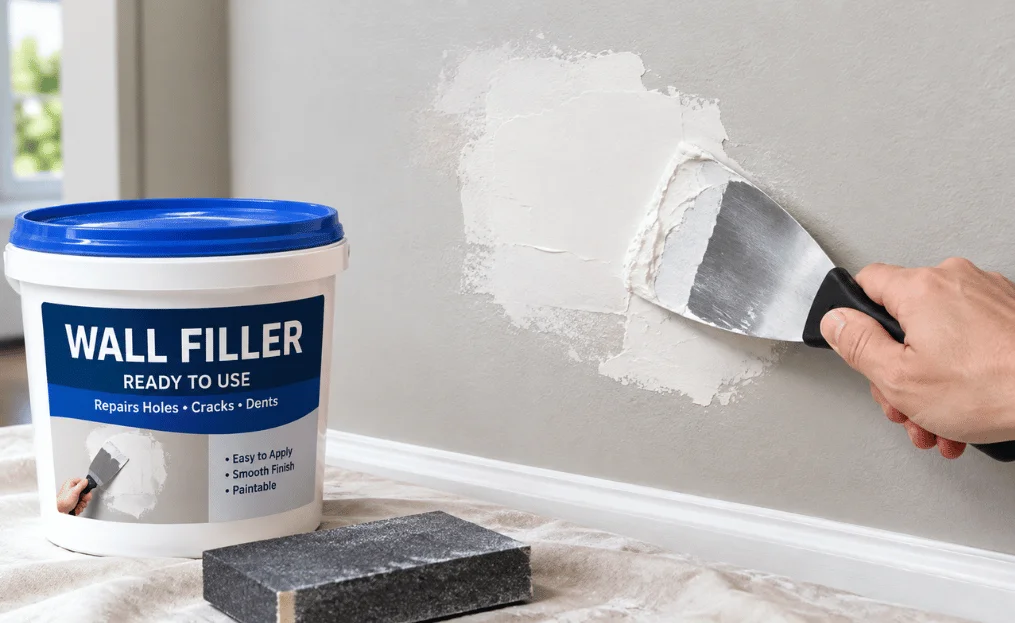
Small cracks, screw holes and dents can make an otherwise tidy room look unfinished. Wall filler repairs these imperfections before painting or decorating. Choosing the correct type matters because different products suit different surfaces, depths and locations. You might also like Wall Lights for Living Room.
For most indoor repairs, a ready-mixed product is convenient and easy to control. Powder fillers often suit larger or deeper repairs where you need more working material. Exterior masonry needs a product specifically designed to withstand outdoor conditions.
Wall filler is a repair compound used to fill cracks, holes, dents, and surface damage before decorating. Choose ready-mixed filler for convenient small repairs and powder filler for larger jobs. Exterior walls need a weather-resistant masonry product. Apply thin, controlled layers and sand them smooth before painting.
Wall filler at a glance
| Repair | Suitable filler | Preparation | Typical finishing |
|---|---|---|---|
| Nail or screw holes | Ready-mixed | Remove dust and loose material. | Light sanding |
| Hairline cracks | Fine surface or flexible filler | Open loose edges and clean. | Fine sanding |
| Deeper holes | Powder or deep-repair filler | Remove weak material | Fill in suitable layers. |
| Plaster imperfections | Fine surface filler | Clean and dry surface | Sand flush |
| Moving joints | Flexible filler | Clean adjoining surfaces. | Follow product instructions. |
| Exterior masonry | Exterior masonry filler | Remove loose material and dirt. | Exterior paint or coating |
UK retailers stock both ready-to-use and powder products for different repair depths. Some products are designed for shallow finishing, while others permit much deeper repairs. Always check the manufacturer’s stated depth, drying time, and surface compatibility before starting.
What is wall filler used for?
The main purpose is to create an even surface before paint, wallpaper, or another decorative finish. It can repair holes left by picture hooks, screws, and wall plugs. Suitable products can also correct dents, cracks, and minor damaged areas in plaster.
Good preparation becomes especially noticeable once a wall receives fresh paint. Light can expose ridges, depressions and rough edges that seemed insignificant beforehand. Filling and sanding those areas creates a more consistent surface for the final coating.
This preparation also matters before applying decorative finishes. Wordify’s guide to modern wall finishes explains how surface preparation affects the finished appearance. A smooth base is especially useful beneath wallpaper and other finishes that reveal imperfections.
Types of filler available in the UK
The right product depends on the repair rather than the brand name alone. UK shops sell products for fine surfaces, general repairs, deep holes, and exterior masonry. Understanding these categories makes choosing a suitable option much easier.
Ready-mixed filler
Ready-mixed products come prepared for immediate application. They are convenient for small holes, dents, and everyday decorating repairs. You also avoid measuring water or trying to achieve the correct mixing consistency.
Their main advantage is convenience, especially when you only need a small amount. The container can often be resealed for another repair, subject to its storage instructions. Check the stated maximum depth because some formulations are intended only for shallow repairs.
Powder filler
Powder products are mixed with water before application. They can be useful when repairing several damaged areas or tackling deeper imperfections. You can mix only the quantity needed for the current job.
Correct mixing is important because an unsuitable consistency makes application harder. Follow the manufacturer’s water ratio instead of estimating it. Mix thoroughly enough to remove dry pockets without preparing more material than you can use.
Fine surface filler
Fine products are intended for shallow scratches, tiny dents, and surface imperfections. Their smooth texture makes them useful during final preparation before painting. They aren’t automatically suitable for deep holes simply because they produce a neat finish.
Use them where only a thin correction is required. Larger voids usually need a product designed for greater depth. A fine finishing layer may then be used if the chosen repair system permits it.
Flexible filler
Small cracks sometimes return because the materials around them move slightly. Flexible formulations are designed for locations where limited movement is expected. They can be useful around certain frames, skirting boards and junctions between different materials.
Don’t assume every recurring crack only needs a more flexible product. Repeated or widening cracks can indicate movement that needs further investigation. Filling should address surface damage rather than conceal an unresolved structural problem.
Exterior masonry filler
Outside repairs face rain, changing temperatures, and repeated weather exposure. An interior decorating product may not tolerate those conditions. Exterior masonry formulations are made for compatible outdoor surfaces and should state this clearly on their packaging.
Check whether the product suits brick, render, concrete, or another specific substrate. Surface preparation remains important because loose or dusty masonry reduces adhesion. Follow the stated curing period before applying an exterior coating.
How to choose the right wall filler
Start with the surface because plaster, masonry, and timber have different properties. Next, measure the approximate depth and width of the damage. These two checks remove many unsuitable products immediately.
Then consider whether the repaired area may move. A static screw hole needs different properties from a joint beside a frame. Location also matters because outdoor repairs require products rated for exterior exposure.
Before buying, check these points.
- Interior or exterior use
- Compatible wall material
- Maximum permitted fill depth
- Drying or setting time
- Whether sanding is required
- Whether the product accepts paint
- Whether movement is expected
- Manufacturer preparation requirements
UK product ranges demonstrate why these checks matter. Current listings include fine products with shallow depth limits and repair products intended for much deeper filling. Choosing by the words “filler” or “multi-purpose” alone can therefore produce poor results.
How to apply wall filler for a smooth finish
A good repair depends as much on preparation as application. Rushing the first stage can leave weak edges beneath an otherwise smooth patch. Set aside enough time for cleaning, filling, drying, and finishing.
- Inspect the damage. Check whether the area is a simple cosmetic defect or a recurring problem.
- Remove loose material. Scrape away flaky paint and weak, crumbling edges without enlarging sound areas unnecessarily.
- Clean the repair. Remove dust and debris so the product can contact a stable surface.
- Prepare the product. Stir ready-mixed material or prepare powder according to its manufacturer’s directions.
- Press filler into the repair. Work it firmly into the damaged area instead of coating only the surface.
- Remove excess material. Draw a filling knife across the repair and keep the surface controlled.
- Allow proper drying. Use the manufacturer’s stated drying time rather than judging only by surface appearance.
- Sand carefully. Smooth the repair until its edges blend into the surrounding wall.
- Remove sanding dust. Leave a clean surface before applying primer or paint.
- Decorate as directed. Prime where the coating system or repaired surface requires it.
For related DIY preparation, Wordify’s guide to Modern Garden Ideas On A Budget explains why matching products with surfaces matters. The same principle applies here. A product performs best when its intended material and conditions match the repair.
Common mistakes that leave repairs visible
Applying too much material is a frequent problem. A large mound takes more sanding and can leave a noticeable raised patch. Controlled application usually creates a cleaner repair with less finishing work.
Another mistake is painting before the repair has dried properly. Drying times vary considerably between formulations and repair depths. Follow the product instructions even when the exposed surface already feels dry.
Poor sanding can also reveal the repair after painting. Sanding only the center may leave a hard ridge around the edge. Feathering the transition helps the repaired section blend with the original surface.
Ignoring the cause of repeated damage creates another problem. A crack that repeatedly opens may involve movement, moisture, or another underlying issue. Repeatedly covering it without investigation can waste both filler and paint.
Filling holes left by screws and wall plugs
Remove the screw before deciding whether the plug should also come out. A protruding or loose plug can interfere with the repair. Avoid damaging a larger area of sound plaster while removing it.
Clean the hole and press suitable material firmly inside. Don’t leave an empty pocket behind a thin surface layer. Deeper holes may require a dedicated repair product or staged application according to its instructions.
Once dry, sand the patch flush with the surrounding wall. Run your fingertips across the area to find raised edges that are difficult to see. Remove the resulting dust before decorating.
Repairing cracks before painting
First establish whether the crack appears stable. Fine cosmetic cracks in plaster are different from cracks that grow, repeatedly reopen, or accompany other movement. Seek professional advice when the pattern suggests something more than superficial decorative damage.
For an ordinary stable crack, remove loose edges and dust before filling. The repair material needs contact with a firm substrate. Don’t simply smear compound over flaky paint or crumbling material.
Allow the repair to dry fully before sanding. A bright work light held across the wall can expose remaining ridges and hollows. Correct them before painting because a fresh coating can make imperfections more noticeable.
Preparing walls for wallpaper and other finishes
Wallpaper needs a sound, suitably prepared surface. Holes and pronounced dents can affect how the finished covering sits. Surface defects may also become visible beneath thinner materials.
Wordify’s article on modern wall finishes discusses the importance of preparation before wallpaper installation. The site’s custom-cut window film guide also shows how careful surface preparation affects other home-finishing projects. Both examples reinforce a useful DIY rule: the visible finish depends heavily on the surface underneath.
After filling, remove sanding residue thoroughly. Follow the wallpaper or coating manufacturer’s preparation instructions before continuing. Different wall coverings can require different primers, sealers or surface conditions.
When filler isn’t enough
Not every damaged wall is a straightforward decorating repair. Large areas of loose plaster, persistent dampness or substantial movement need more investigation. Covering the symptom can hide the problem temporarily without solving its cause.
Watch for cracks that widen noticeably or return soon after repair. Also investigate staining, damp patches or crumbling surfaces before decorating. These signs can require specialist assessment rather than another layer of repair compound.
The same judgement applies across household maintenance. Wordify’s drain snake guide distinguishes manageable DIY problems from situations needing different tools or professional help. Wall repairs also become safer and more effective when you recognize the limits of a cosmetic fix.
Frequently asked questions about wall filler.
What is the best wall filler for small holes?
A ready-mixed interior product is often convenient for small cosmetic holes in compatible surfaces. It requires no mixing and is easy to apply in controlled amounts. Check its maximum depth and drying instructions before use.
How long does filler take to dry?
Drying time depends on the formulation, repair depth, and surrounding conditions. Some UK products are designed for rapid painting, while others require several hours or longer. Use the time printed on your chosen product rather than a universal estimate.
Can I paint directly over filler?
Many decorating fillers are paintable after they have dried correctly. Some repairs or paint systems may benefit from priming to prevent uneven absorption. Follow both the filler and paint manufacturers’ instructions for the specific surfaces involved.
Should I use ready-mixed or powder filler?
Ready-mixed products suit convenient, smaller household repairs. Powder formulations can be useful for larger jobs and products designed for deeper filling. The correct choice depends more on the repair specification than the format alone.
Can I fill a deep hole in one application?
Only if the chosen product permits that depth. Some products have strict maximum depths, while dedicated deep-repair formulations allow considerably thicker applications. Check the packaging and never assume every filler behaves identically.
Why can I still see the repaired area after painting?
The patch may remain raised, hollow, or more absorbent than the surrounding wall. Poor edge sanding can also create a visible outline under certain lighting. Careful finishing and appropriate priming can help create a more uniform painted surface.
Get the repair right before you decorate.
A smooth result starts with choosing a product suited to the surface, depth and location. Good preparation then gives that material a stable base. Patient drying and careful sanding complete the repair before decoration begins.
For a typical UK home, keeping a small ready-mixed product available can handle many everyday cosmetic repairs. Larger holes, exterior masonry, and moving cracks need more specialized choices. Read the technical instructions before application rather than treating every damaged surface the same way.
Repairing the wall properly can save time during painting and improve the final appearance. Inspect first, choose the correct material, and prepare the surface carefully. That approach produces a cleaner result than trying to hide defects beneath extra paint.